

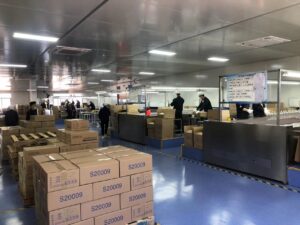
As we all know, all products should be full inspected before they leave the factory and this is the key procedure to ensure our stable qulaity. So what inspection test will be carried out on glass cosmetic bottles? The following are the detection methods used by our company for your reference.

1. Bottle inspection
1.1. Visual inspection: For those with corrected visual acuity of not less than 1.2 and no color blindness and color weakness eye diseases, under natural light or 40W incandescent light or standard light source, the detection method is to look at the object 300mm away from the object for 2 seconds. This test will be 100% apply on line for all the glass bottle before packing.
1.2. Color inspection: Place the tested sample and standard product (including the color upper and lower limit samples confirmed by both parties) under natural light or 40W incandescent light or standard light source, 300mm away from the sample, with a 90° angle light source and a 45° angle light source. The viewing angle of the line of sight, using the detection method of color comparison with the standard sample.This test is also 100% apply on line as full inspection.
1.3. Wiping method: Wipe the tested product back and forth 20 times with moderate strength (10N force) of white non-woven fabric soaked in 75% alcohol solution.This test apply on the bottles after painting and make sure the adhesion is in good condition.
1.4. Paste method: Use special adhesive tape to stick it on the same position on the surface of hot stamping, printing, spraying, and electroplating, smooth and make the covered part free of air bubbles, let it stand for 1 minute, pull it up instantly and smoothly along the angle of 45°~90°, and paste it continuously. Several times, the method of testing the fastness of hot stamping, printing, spraying, and electroplating is called the sticking method. (The number of pastes is different for specific projects).

1.5. Hundred grid method: In the range of 1 square centimeter every 1mm horizontally and vertically, use a cutting knife to evenly apply force to the surface to make a line, to form a specified number of cuts of 10*10, 1mm*1mm of small grids, all cuts are It should be scratched to the surface of the substrate, and after the surface has been cleaned, the test of item 1.4 should be carried out.
1.6. Soak in water+paste method/Hundred grid method: soak the electroplating product in water for 24 hours, soak the sprayed product in water at 45 degrees for 30 minutes, take it out and wipe it dry, and test according to the method of 1.4 and 1.5.
1.7. Friction test: The printing and bronzing parts are rubbed 50 times with filter paper, and there is no obvious abnormality.
1.8. Drop method: Freely drop the test piece from a height of 1.0m to the concrete floor.
1.9. Leak testing method: For the tightness test, the glass bottle of lotion is tested with the content or water of equivalent capacity; the glass bottle of cream (sealed with a plastic bowl) is tested with the content (water can be used if necessary). The volume of the material or water to be filled during the test is required to be equivalent to the volume to be filled during mass production. After matching the hand-pulled pad and lid, inner plug, or pump/spray head, the cream bottle is placed upside down/sideways for 24 hours at room temperature, or The side of the bottle is placed in a vacuum leak detector -0.03Mpa for 10 minutes, and there is no leakage; the other bottle sides are placed in a vacuum leak detector -0.06Mpa for 20 minutes, and there is no leakage.
1.10. Separation method: use adhesive tape to stick on the test piece to make a handle shape, then hook the hook on the tension meter to the tape handle to ensure that the test sample and the tension meter are on the same line, and pull out the test piece at a constant speed. pieces until separation.

2. Net content inspection
Measure a certain amount of water with a graduated cylinder and fill it to the shoulder of the bottle, calculate whether it meets the requirements of the net content, and use the actual content to test if necessary.
3. Air-tightness test
Add a certain amount of water into the bottle, and after assembling the cover (the nozzle into the gasket, the inner bowl (inner plug), put it upside down in a vacuum box and vacuum to -0.08Mpa at room temperature, and keep the negative vacuum pressure for 5 minutes without leakage.
4. Specification and size inspection
Important dimensions such as the outer diameter of the bottle body, the inner and outer diameter of the bottle mouth, the bottle height, the outer diameter of the thread, and the thickness of the bayonet are measured with a vernier caliper and a height gauge with a minimum scale value of 0.01mm.
5. Material inspection
The material inspection of the glass bottle is compared with the standard sample, and the inspection is carried out in combination with the weighing method.
6. Compatibility test
The bottle and the cap (spray head gasket, inner bowl (and inner plug) are manually matched and need to be rotated smoothly. The distance between the bottle caps is measured by plug silicon.
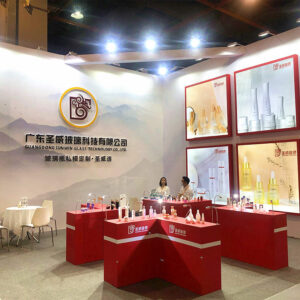
Shengwei Glass was specialized in glass cosmetic bottles for 21 years, our products will be sent to your hands after a series of strict sampling procedures. You can rest assured of the quality of our products, if you have any requirements for glass cosmetic bottles, please don’t hesitate to contact us!


Very good blog post. I absolutely love this website. Keep writing!